finally casting...the mandala pendants

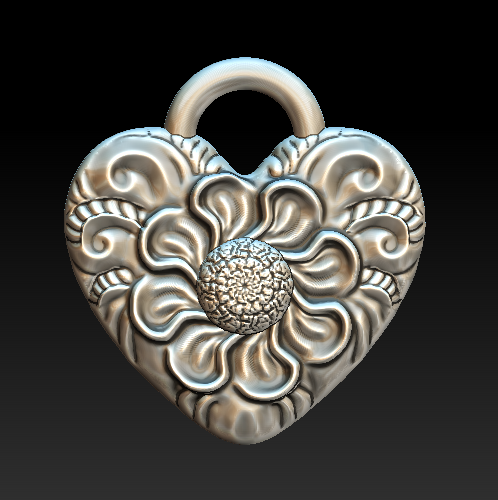
UPDATE, December 2017: Looking back at this post, there are so many things that are wrong! Anyway, a good exploration of what works and what doesn't, and modifying a design to cast and finish more easily. The main change I eventually made to this pendant is to attach the design to a backplate, so the design is simply raised from a background. With a patina, the design is similar but much easier to cast and finish. I have since scrapped this design and melted them all down. So maybe they'll be collector's items someday! And oh my goodness…thankfully my design skills have come a long way. I’ll leave this post up, though, just in case others are having the same issues.

Well, it's finally time. What better time to start casting holiday gifts than a week before Christmas?

It's been an interesting journey. It started back in Denver after I got the casting setup...I remember that my first attempt at casting with a perforated flask, I ran out of acetylene at 1 a.m. and didn't have a way to heat enough metal to cast. The second attempt, I realized that my acetylene/ambient air torch couldn't heat enough metal hot enough to cast. After switching to my old Smith Little Torch (acetylene/oxygen) with a "bud tip," I was able to get the metal melted, but never cast before we suddenly moved back to Texas.

Fast forward over a year. Since then I've taken the wax-working class with Kate Wolf, learned ZBrush, and explored printing in 3D on the Formlabs Form 2. I've printed a lot of things, but the missing link was casting them into metal jewelry.

So I was ready to go! Treed up some models, was burning them out, and my kiln fell victim to the outdoor sprinkler. Since I work late at night usually, I didn't realize that the sprinkler was scheduled to water the lawn that night. The kiln was sitting on a little window in the outdoor kitchen burning out my first 3D model flask, and a poorly aimed sprinkler doused the kiln and killed it. I awoke to an error message and a flask that hadn't completed burnout. I was crushed.

So what do you do when your Paragon SC2 kiln has been watered? Let it sit for a few days and let it dry out. Since this kiln has a metal cabinet, I removed the back and aimed the fan on the inside. Sure enough, about four days later I had the guts to turn it back on. It worked.

Next, I was ready to cast the 3D prints. I prepared the trees, the flask, and tried casting again. I was still having difficulty getting the metal heated correctly. About that time I was helping my parents downsize their house, and my dad gave me a little present...the Kerr Electro-Melt that I needed to get the metal to the right temperature for casting. Something I've learned through research—not in practice—is that metal can be porous if overheated. When melting with a torch, you don't really know how hot the metal is. Any casting I've done in the past was on a very small scale, and I probably just got lucky!
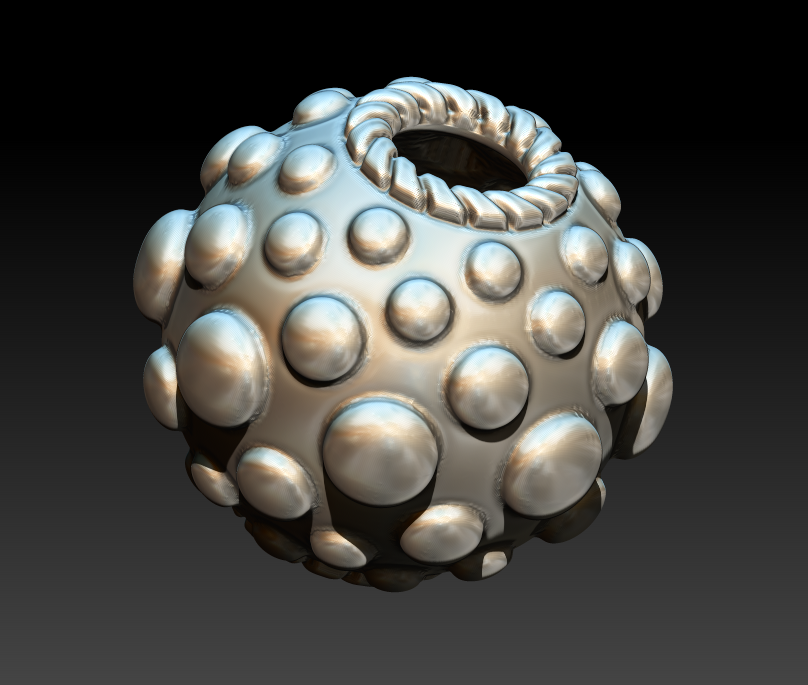
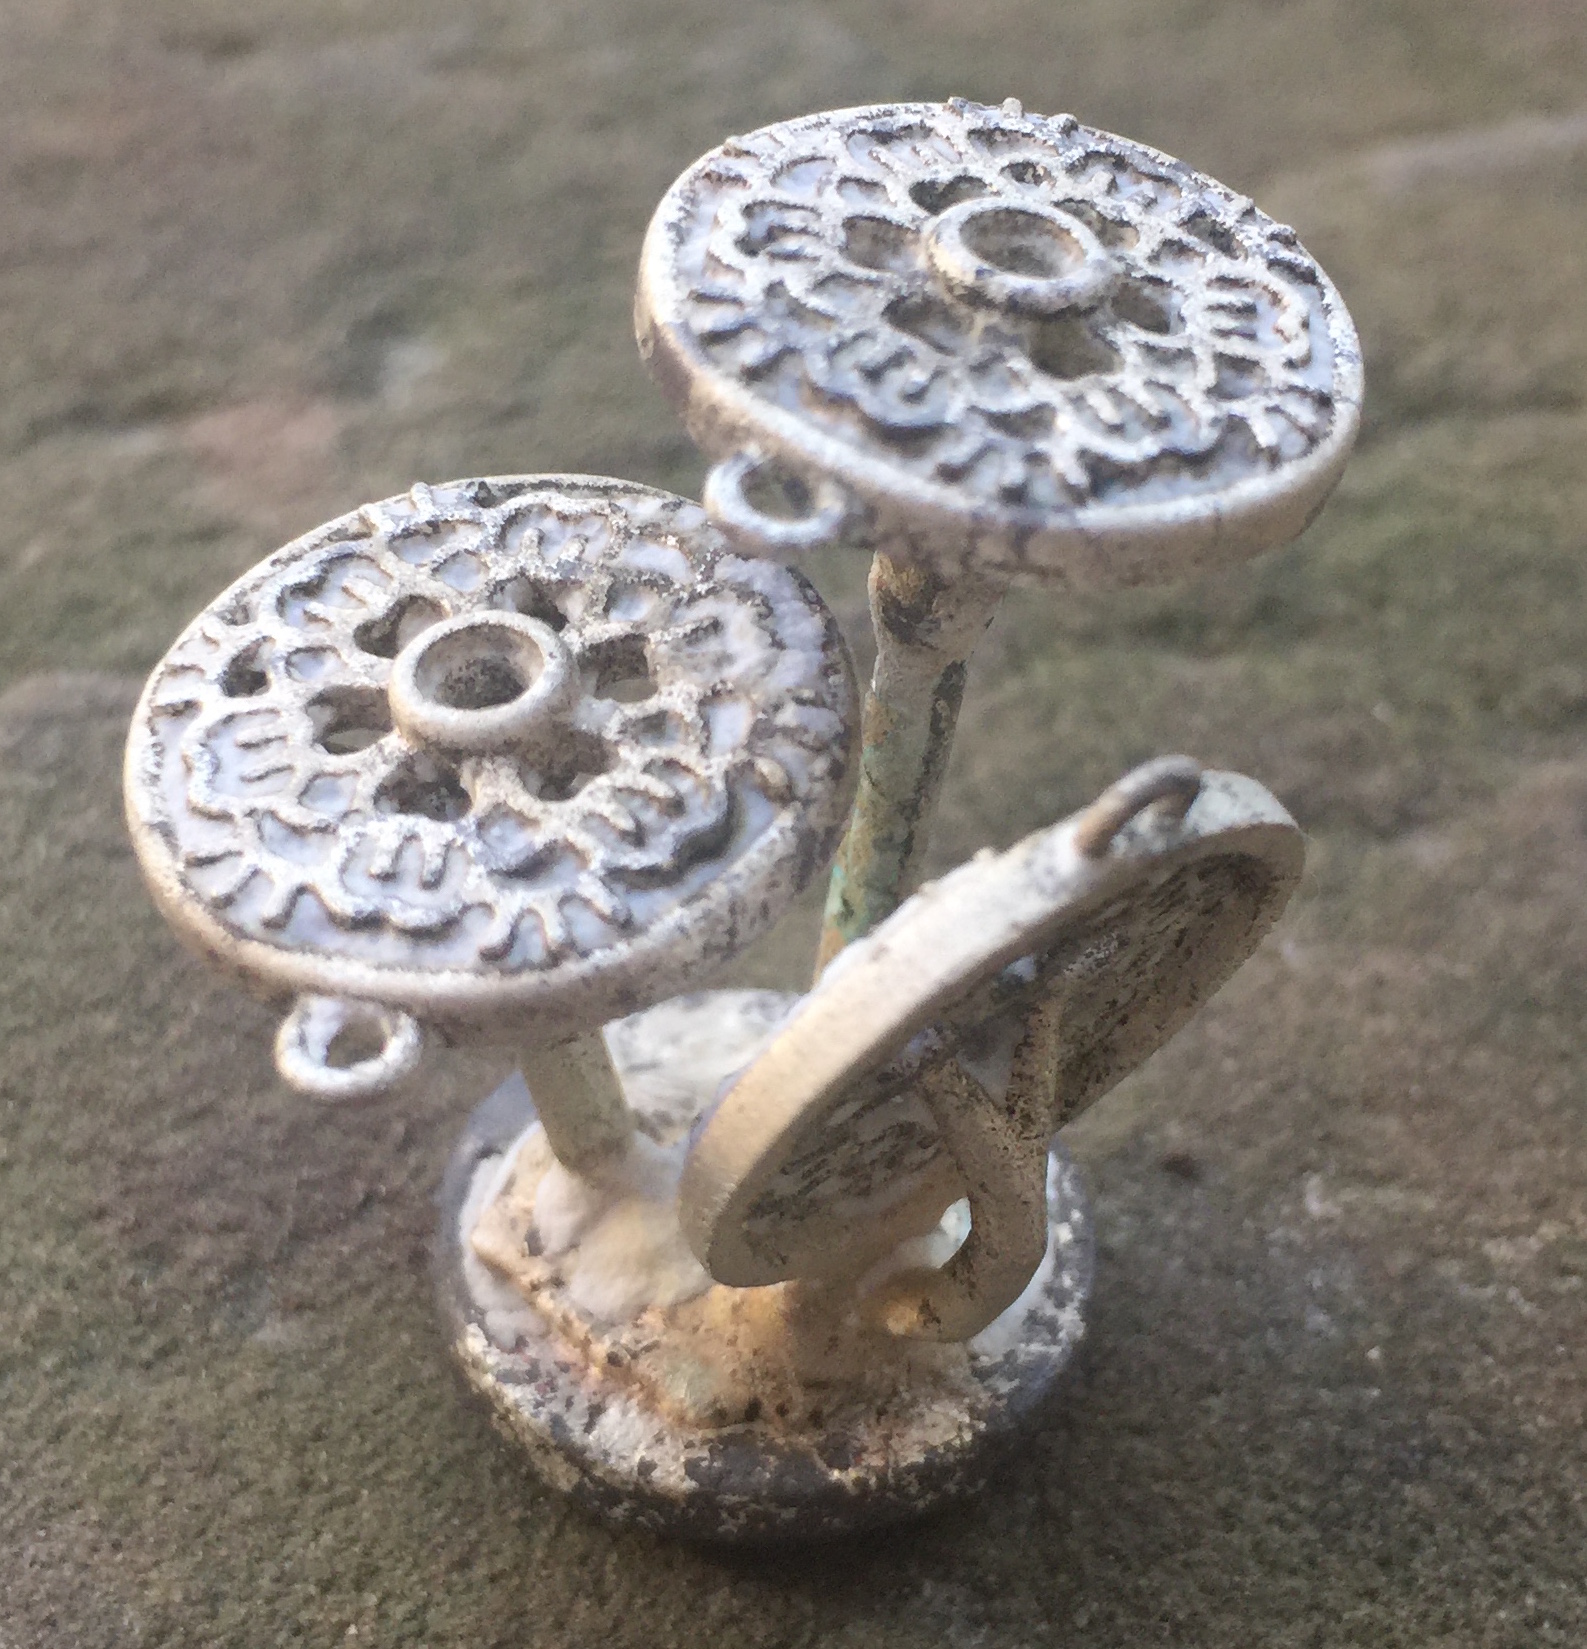
Incomplete casting

Incomplete casting

So I was ready to cast, and treed up some nine models. This time when I cast, I heated the sterling silver to about 1740°F (Kerr recommends going 100°F above the melting temperature of the metal, and silver is about 1640°F). I used the Formlabs castable resin burnout schedule, which clocks in at about 14 hours, landing on a 900°F casting temperature with a 3.5"x4" perforated flask. The result was not good!

But why?

After consulting Creative Side Jewelry Academy here in Austin, and the Formlabs forum, I found that it could be either the metal was not hot enough, or the flask was not hot enough. I found in another article that the flask can drop about 100°F in one minute in a vacuum caster, so it suggested making your flask temperature 100°F hotter. Also, filigree designs require a slightly hotter flask. The girl at Creative Side asked if I cast close to 1100°F, and I remember casting at or near that temperature in the past. Participants in the forum suggested between 900°F, or 950°F for filigree. Then the suggestion that every casting situation is different and these numbers are just guidelines, so it requires experimentation. 

Fast-forward two years later, and my settings now are this: flask temperature at the end is 975°F, and metal in my Kerr Electro-Melt is 1865°F.

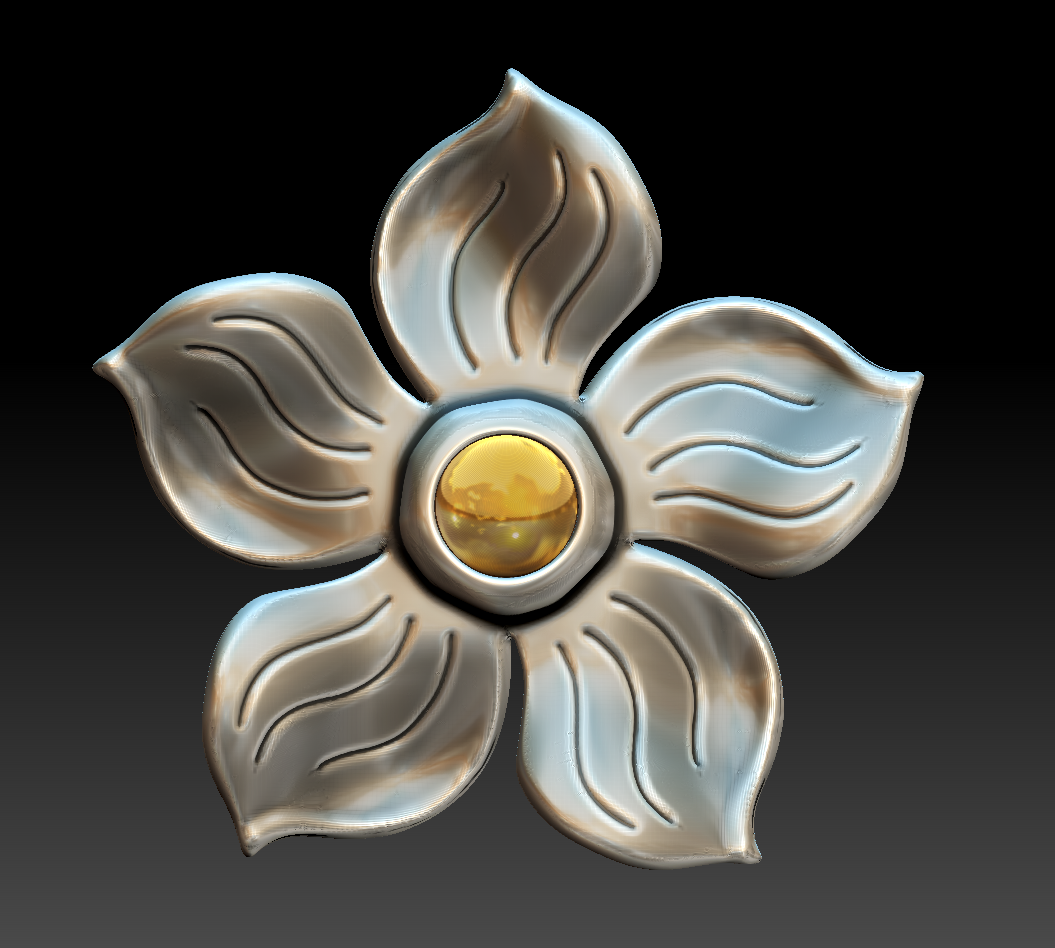
So I set off to cast again. This time, I used two 2"x2.5" flasks, a 2.5"x2.5" flask, and a 2.5"x3" flask, each with three models, rather than trying to cast a tree with ten models (or more?). I also tried adding a forked sprue coming into the bezel on the back, and another configuration with four sprues coming to the back of the frame. On that one I also added two small sprues coming into the back of the bezel. The sprues on the back of the frame are very easy to clean up, but when I 3D printed this one, the different support configuration distorted the frame on the bottom.

I also conquered my fear of cleaning up the jewelry! I learned from the forum that I should try tumbling the pendants for longer (these were polished about 40 minutes on a rotary tumbler), and silicone wheels work well for cleaning up raw castings. So far I hadn't had much luck with them. So I busted out the kit and it worked!  I also tried these little wheels made with 3M micron finishing papers, and they worked well for grinding down the sprues from the back and finishing the back of the frame. And something surprising...the back of the pendant with a patina is as pretty as the back...so it's reversible. I'll have to play around more with that.

However, they were still usable, and became Christmas gifts! 

zbrushcore...zbrush fun at a lower price!

Awhile back I started writing about 3D printing, and my exploration into a piece of software called ZBrush. It was the single most confusing piece of software I've ever tried to learn, but once you "get it," it's simply amazing. There are a lot of resources out there for learning, and the company's ZClassroom is pretty comprehensive. If you still have questions, you can go to Twitter and use the hashtag #AskZBrush, and they will answer with instructional videos on YouTube.

I've researched the different types of software available, and most "bench" jewelers that make mostly engagement-style jewelry are using something called RhinoGold, but the price tag is pretty hefty. If you want to add on the functionality of modeling with a virtual clay, it will set you back over $8,000.

But ZBrush wasn't made for jewelry. It's been around since the late 1990s, and primarily used for creating movie monsters and CGI effects. If you've watched any of the Marvel movies, or even Game of Thrones, you've seen things made with ZBrush.

So I've been working with the most recent version (as of Fall 2016), which is ZBrush 4R7, costing about $800. I understand 4R8 is coming, but a little surprise happened along the way...a new version called ZBrushCore. This new version is targeted at folks who want to get started with 3D modeling in ZBrush, who might not need all the bells and whistles, and who want a lower price. Voila! ZBrushCore is $199.

Click to enlarge

Feeling pretty advanced with ZBrush, at least where jewelry is concerned, I volunteered to give a demo to a fellow glass artist who is interested in using 3D printing to create specialized tools. At first I gave her a demo of ZBrush 4R7, well before the introduction of ZBrushCore. Then she came over for a quick intro lesson on the new software, and I was thrown off a little by some of the tools that are missing, but we still had a successful tutorial session, making some press molds for clay. But as you can see, the Palettes are significantly simplified.

After getting a chance to work more with ZBC, I found there are workarounds for someone working with jewelry designs. And Pixologic has also included some starting projects in the "Lightbox" for a signet ring, a plain band, and an engagement ring. There are also wonderful videos for getting started...the ring below is a variation of one of their tutorials. I added the bezel and stone, and hollowed out the back of the ring so that it would be lighter to cast. The new version also includes simplified exports for 3D printing, but I haven't tried those yet.

New Gizmo 3D tool

ZBrushCore is also limited to 30 different brushes, but the majority of them are the brushes I use most. I did try loading some of my favorite brushes from ZBrush 4R7, but I got a message that says that ZBrushCore only allows brushes created in that program. I'll have to look into that...can I make brushes? But it did let me load in my favorite materials (Shiny, Shiny Dirty, and Dirty Blue).

It was also missing some of the Clipping Brushes...most notably the ClipRect brush that I use frequently. I tried adding it, but it wasn't accessible. I also couldn't find the Close Holes function, but found that when a Dynamesh operation is performed, the holes automatically close. I really like the new Gizmo 3D tool that allows the user to more easily rotate, stretch, and resize the model, and look forward to that be added into the full version of ZBrush.

One other thing that might throw off an experienced ZBrush user is the masking brushes. At first you think that some of the mask brushes are missing, but check the Stroke options below the masking brushes, and you'll find your old friends. the Curve and Lasso options. Under the mask brushes, you'll also see the new additions of PerfectCircle and PerfectSquare.  These were formerly checkboxes in the Stroke options, but adding them in as an easily accessible tool makes things really nice.

If you've got the extra money for the full version of ZBrush 4R7, I would recommend the full version, but if you're on a budget and just getting started, ZBrushCore is a great program that simplifies the learning process, and still produces models that can be easily printed in 3D.

I'll write more about this over the weekend, and create a tutorial on how to make a ring for YouTube. But if you're interested in digital sculpting, ZBrushCore is a great place to start!

Variation of silver ring from ZBrushCore's tutorials

3D printing...first results from Shapeways

So here it is. The very first "print" test from Shapeways.

First of all, they are VERY delicate. So delicate that the jump ring on one of the pieces fell off with very minimal handling. That's actually a good thing, because it tells me I need to beef these up a little. But there are some other design issues that I'll have to address.

First of all, there are visible striations in the design. I had seen a setting that allows the designer to SET 3D PRINTING ORIENTATION. However, because of the placement on the page, I thought this related to the "Strong & Flexible Plastic" material only. It ends up it's just bad placement on their page...and I should have used this to adjust the layers of the print.

Interestingly, the size is almost dead-on. Shapeways shows that the CAD design was 1.8 cm, and my calipers reveal the print is only slightly smaller—1.798 cm. That's a VERY small difference. I allowed for a hole for a magnet, and it fits...but only barely. Simple fix, I'll just have to make that whole a little larger. By the time I cast the pendant, it would also shrink a little (wax shrinks as it cools), so I need to take that into consideration.

Another issue is the depth of the design. Because the design didn't stand out enough, the design could easily be polished off during finishing. I just need to increase that depth.

LOOKBACK: Shapeways allowed me to print this in wax with a design that was not raised enough. They have a page of design standards for each material on their site, and I would recommend highly that you check it out BEFORE starting your design. A good rule of thumb in sterling silver is to raise the design about 0.4mm from the surface, but that will vary depending on if you want the raw look or high-polished look. If you’re working in ZBrush, you can use the Transpose Line to measure the thickness if you’re using my techniques.

Overall, I'm excited, but a little disappointed. One thing I didn't realize is that Shapeways is using a technology called "Multijet Modeling" to print wax, and I don't think the resolution is as high as some of the SLA (stereolithography printers) I've looked into. The quality is not nearly as good as the samples I received from Solus and Formlabs. 

So it's back to the drawing board and time to send another sample. Wish me luck!

adventures in zbrush

It's been a few months of working to master a program called ZBrush...literally the most difficult program I've ever worked with. It's a program primarily used for the creation of amazing creatures for the movie industry, but flexible enough it's being used by jewelry artists.

I've been fascinated by CAD since my senior project at the University of Texas in the early 1990s, where I made a ten-second video of a prickly pear cactus losing a fruit that bounced off a table and onto the floor. It was primitive, but took months of work. And at this point, I have no idea how models make their way out of ZBrush and into an actual movie, but the modeling is just downright amazing.

My goal is to be able to design jewelry and send it out eventually to a casting house while sitting in a beach cabaña on an island somewhere, but for the time being I'll be 3D printing the models and casting them myself. I am optimistic! 

I am also in the process of creating instructional videos in ZBrush for jewelry artists, and hope to be teaching others in the near future.